How to print checks
Writing checks by hand is a thing of the past once you have RPM! Our software allows you to quickly and easily print checks for all your clients’ check payments. Follow along below to learn more about the process of creating and printing checks.
Creating check transactions
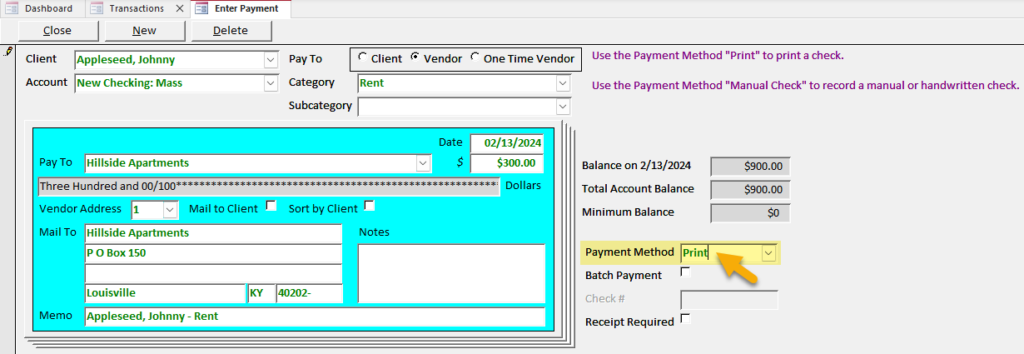
To create transactions that you need to print out as checks, select “Print” as the “Payment Method.”
Transactions can be entered and scheduled in several different ways, but you can create checks through all of them by simply selecting “Print.” See our article on creating transactions for more details about entering and scheduling transactions.
Below, you can see an example of a manually entered payment that will print out as a check.
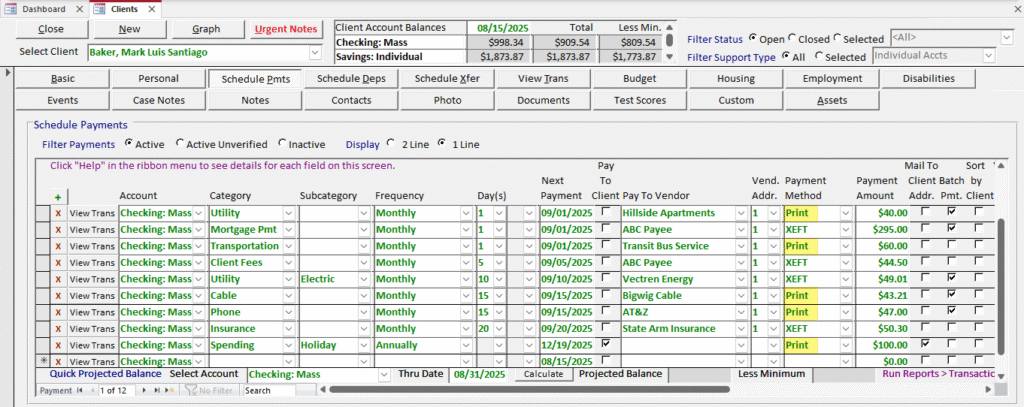
Here, you can see several scheduled transactions that are set to “Print.” When these transactions are processed every week/month, checks will be ready to print.
Navigating to the Print Checks screen
There are two main ways to navigate to the screen on which you can print your checks. The first way is to open your Dashboard and click the Unprinted Checks button.
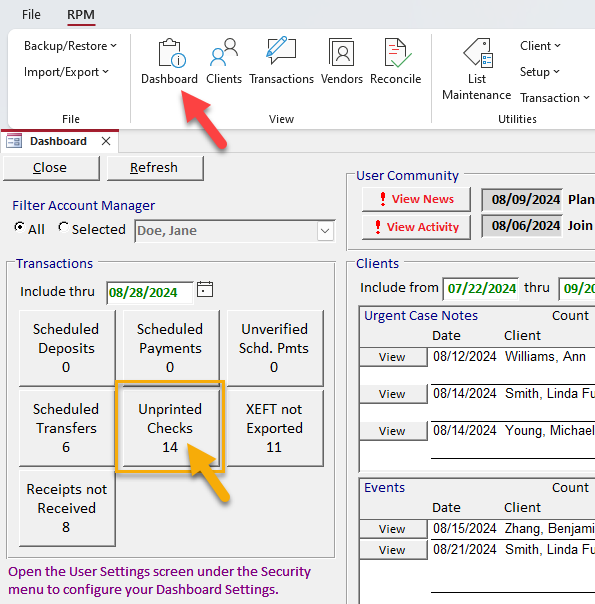
Note: If you have no checks ready to be printed, you won’t be able to open the Print Checks screen from the Dashboard. Make sure you’ve processed all your scheduled payments first. If your payments have already been processed, make sure your dashboard is showing the correct “Include thru” date.
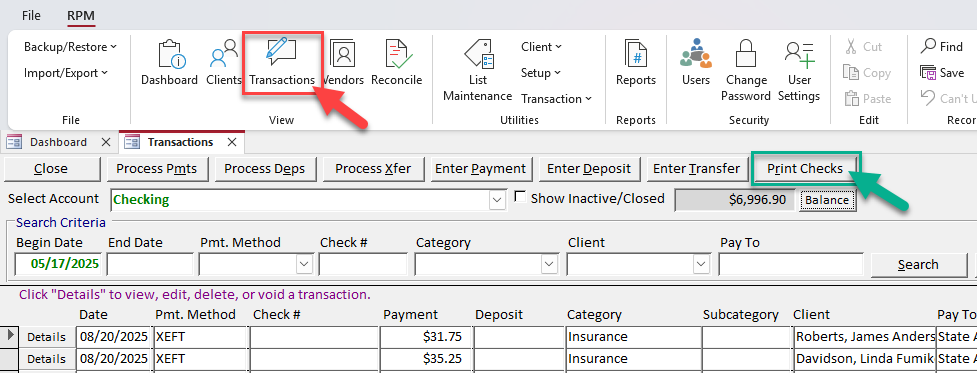
The second way is to open the Transactions screen and click the Print Checks button, as shown below.
Selecting checks to print
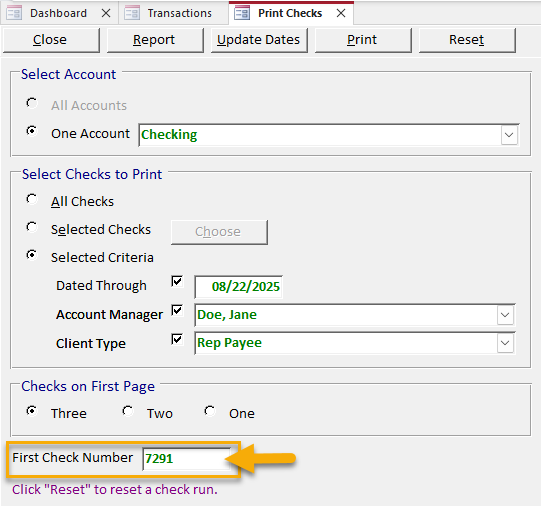
On the Print Checks screen, you can choose which checks you’d like to print if there are multiple checks available.
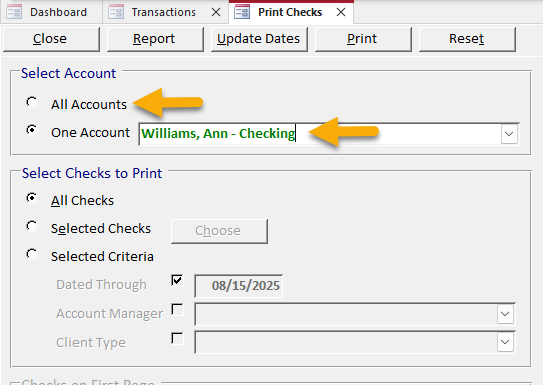
Account
First, choose whether to print checks from all accounts or one specific account. If you select “One Account,” select that account from the dropdown.
Manual or criteria selection
Next, select criteria to further narrow down the checks (or not). To print all checks in the selected account(s), leave “All Checks” Selected.
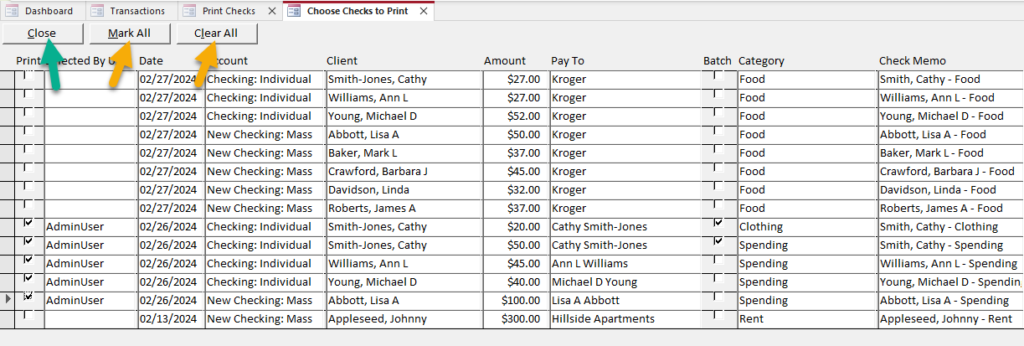
To manually choose certain checks to print, select “Selected Checks” and click Choose. This will open the Choose Checks to Print screen, where you can manually mark checks in the “Print” column. To quickly mark all checks, click Mark All, then deselect the checks you wish not to print. To clear all selections, click Clear All. When you have selected the checks you wish to print, click Close.
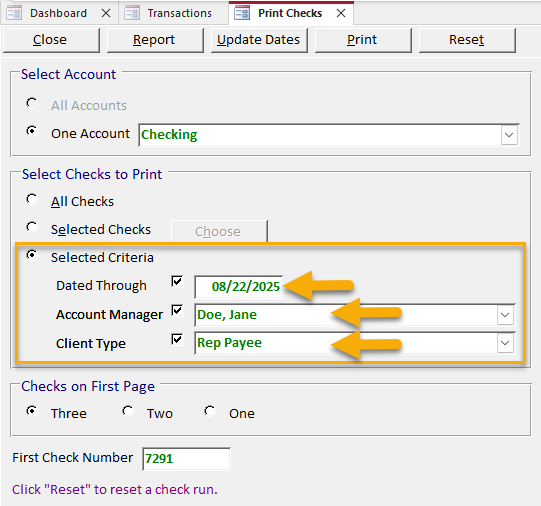
To filter checks by date, account manager, or client type, select the “Selected Criteria” option. Then, type or select a “Dated Through” date, account manager, and/or client type.
Checks on first page
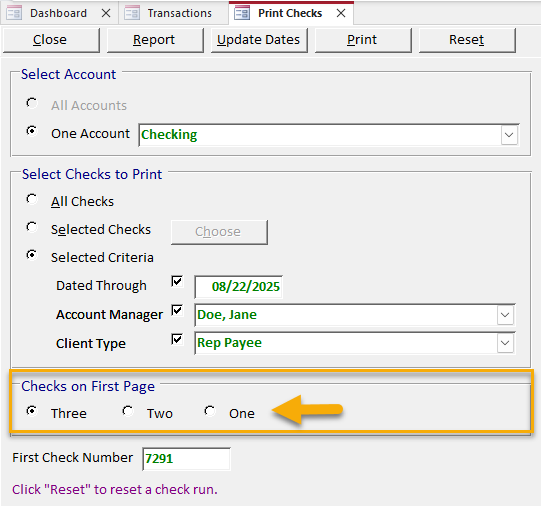
If you’re printing three checks per page, select how many checks will print on the first page of this check run by clicking one of the radio buttons in the “Checks on First Page” section. Your check layout settings can be changed in Utilities > Setup > Check Layout.
First check number
If your system is set to use pre-printed checks, enter the first check number that will be printed during this check run in the “First Check Number” field. If you’re printing check numbers, this field will not be available; the system will calculate the next check number automatically. Your check layout settings can be changed in Utilities > Setup > Check Layout.
Note: If you’re printing check numbers and the next check number is incorrect, check out our article on resetting next check numbers to learn how to correct them manually.
Updating dates before printing
At the top of the Print Checks screen, click the Update Dates button to open the Update Transaction Dates screen. Here, you can update the dates of checks waiting to be printed, either one at a time or all at once.
This is an optional step in the check printing process. A batch of checks can just as easily be printed with various transaction dates.

Click the Update Dates button on the Print Checks screen.
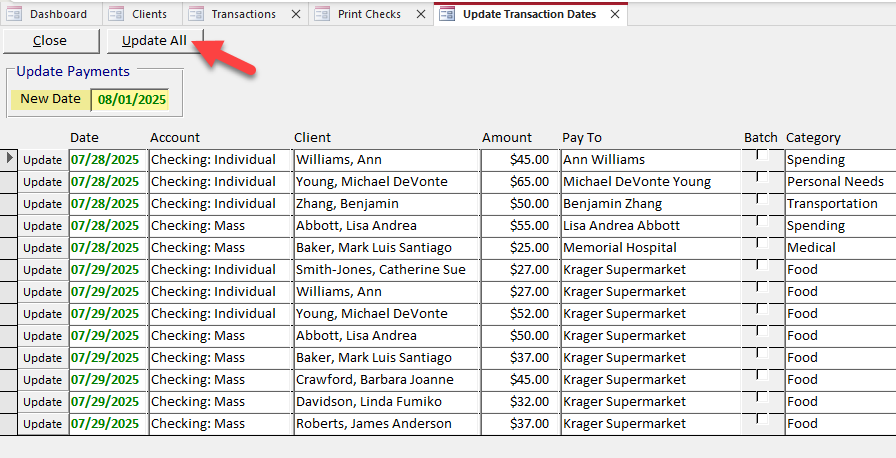
Select a New Date, which can be a current or future date. Click Update All to update all the listed checks to that date.
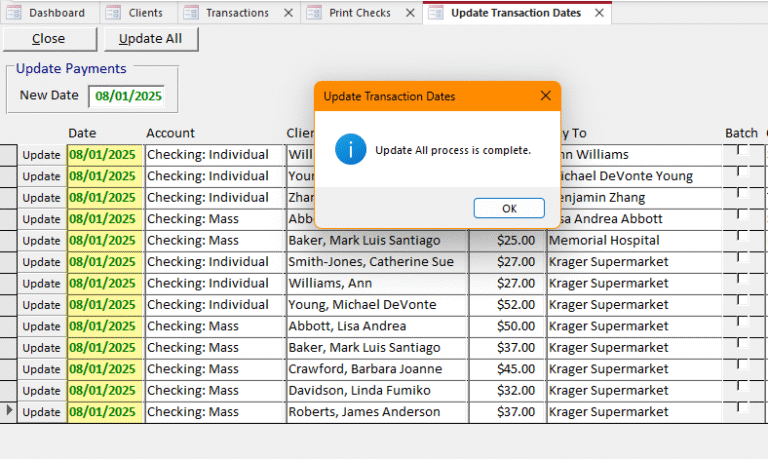
Individual check dates can also be changed manually on this screen.
Report
After you’ve selected your checks, review them by clicking Report. This will open up a Checks Selected to Print report on which you can see details about the transactions that will be printed.
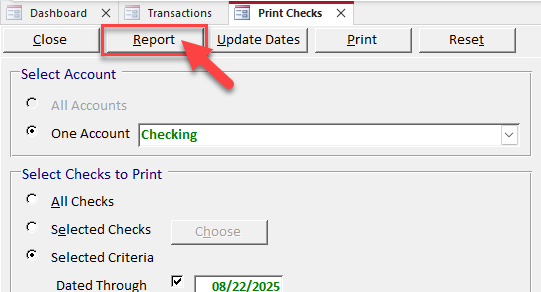
Note: Prior to version 6.0.7, this button was called “Preview.”
Selecting your printer and tray
Once you’ve selected and reviewed the checks you’d like to print, choose your desired printer. Your Windows default printer will automatically populate in the “Default Printer” option. To use a different printer or tray, select the “Specific Printer” option, then select your desired printer and/or tray from the dropdown lists.
To select advanced printer settings (added in 6.0.7 C), select the “Advanced Printer” option and click Settings.
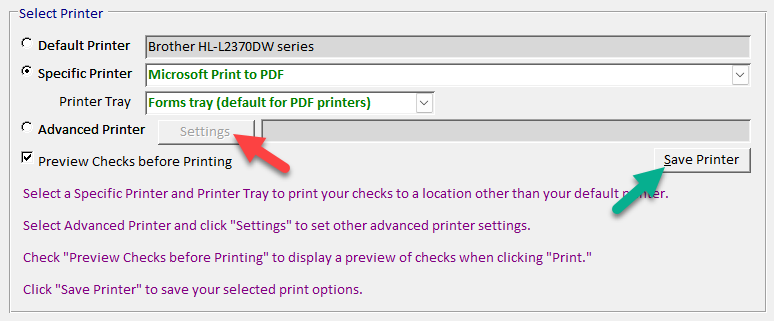
To save your printer, tray, and preview settings for next time you print checks, click Save Printer. If this was a one-time change, don’t save, and your previous defaults will return for next time.
Note: If you’re using RPM Cloud through a browser tab, your default printer will be “Cloud PDF (redirected X),” with the X being a random number between 1 and 20. This number may change if you close and reopen RPM. Use the “Cloud PDF (redirected X)” option to open your checks in a separate browser tab; from there, send them to your local check printer.
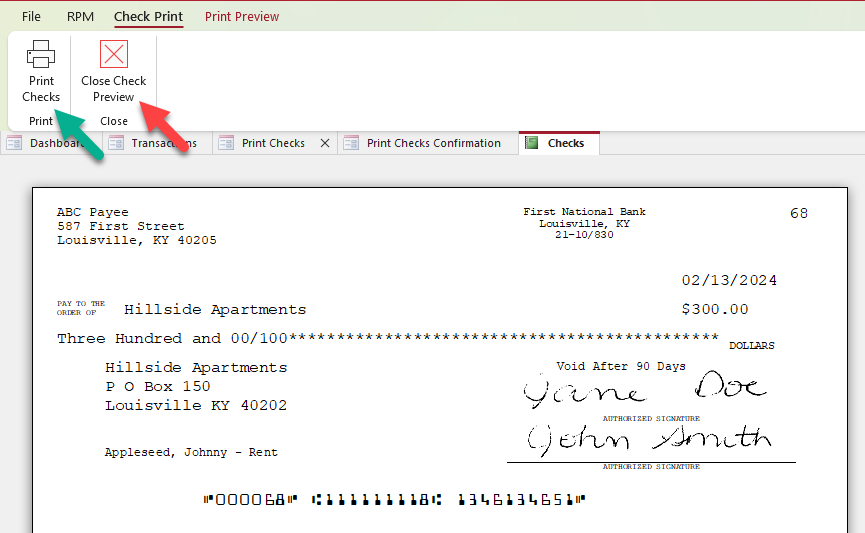
Print preview
If you check the “Preview Checks Before Printing” option, clicking Print will open your checks in a Print Preview screen, like the one you see below. From this screen, you can review the way your checks will look before you actually print them. If you’re satisfied, click Print Checks and send them to the printer (or PDF); if you aren’t, just Close the preview and make changes before previewing them again.
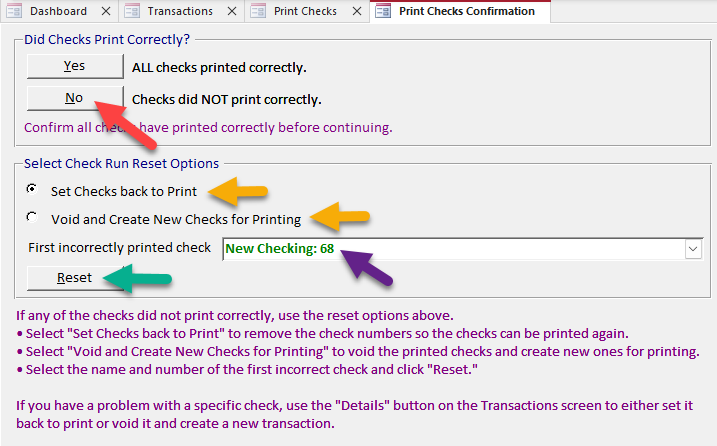
Reset checks
If you’ve printed your checks and realized something went wrong—for example, your check paper jammed, your printer ran out of ink, or you forgot to replace the drum and there are unsightly black streaks all over the checks—you can immediately reset them and try again.
On the Print Checks Confirmation screen that automatically opens after you print, simply click No, then choose to either set the checks back to print (to wipe the slate clean and try again) or void them and create new checks for printing (to keep a record of the botched checks). If you’re using pre-printed check paper, “void and create new” will be your best option. Select the first check that printed incorrectly, then click Reset.
If you’ve already closed this screen and realize your checks are botched, don’t panic! Head to our article on resetting check runs to see how to reset them another way.