How to add transactions
RPM allows you to create transactions (deposits, payments, and transfers) for your clients.
There are three different ways to add transactions in RPM:
- Enter transactions one at a time through the Transactions screen.
- Schedule transactions by client through the Clients screen.
- Schedule multiple transactions at once using the scheduling utilities.
Entering transactions one at a time
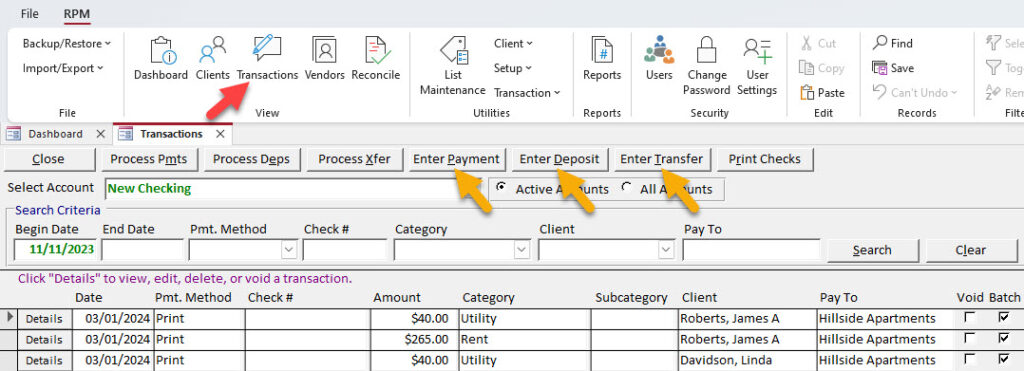
If you want to enter a single transaction manually, use the Transactions screen in the View section of the ribbon menu. On this screen, choose between the Enter Payment, Enter Deposit, and Enter Transfer buttons.

See detailed information about each of these options here: Entering transactions manually.
Scheduling transactions by client
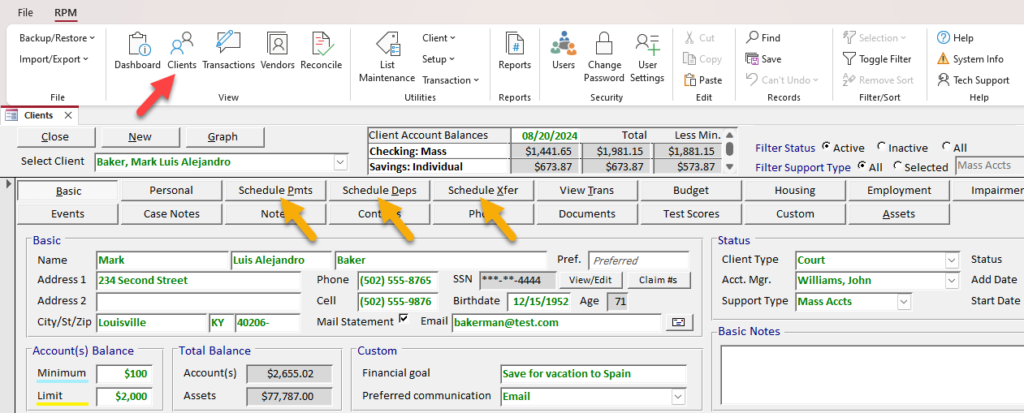
If you want to schedule a recurring payment, deposit, or transfer for one of your clients, do so on the Clients screen. Navigate to the client record for the appropriate client, then use the Schedule Pmts, Schedule Deps, or Schedule Xfer button.

See detailed information about each of these options here: Scheduling transactions by client.
Scheduling multiple transactions at once
If you want to save time and schedule the same transaction for multiple clients (for example, a client fee paid to your company or a pension deposit), use Utilities.
In the Utilities section of the ribbon menu, select Transaction, open the Scheduling section, then choose either Create Scheduled Deposits or Create Scheduled Payments.

See detailed information about these utilities here: Scheduling utilities – Creating transactions.
