Setting up bank and bank accounts
If you’re just getting started with a brand-new copy of RPM, you’ll need to input your bank and bank account information. Follow along below to see how!
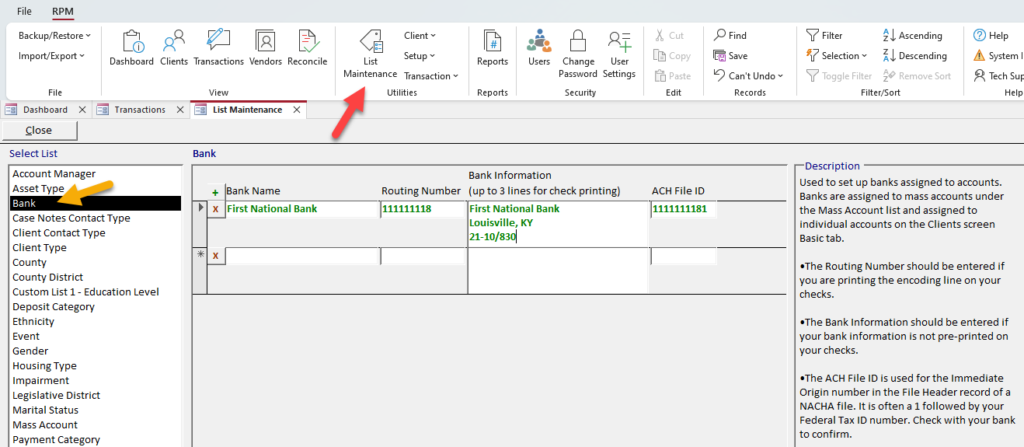
Bank
To enter your bank into RPM, follow these steps:
- Open the List Maintenance screen from the Utilities section of the ribbon menu.
- Select the “Bank” list.
- In the first record, type in the name of your bank.
- If you will be printing the encoding line on your checks, enter your bank’s routing number.
- If you will be printing your bank information on your checks, enter the bank information.
- If you will be using NACHA files to send transactions to your bank, enter the ACH File ID number.
When you are finished, the record will save automatically. You will be able to assign this bank to mass and/or individual bank accounts.
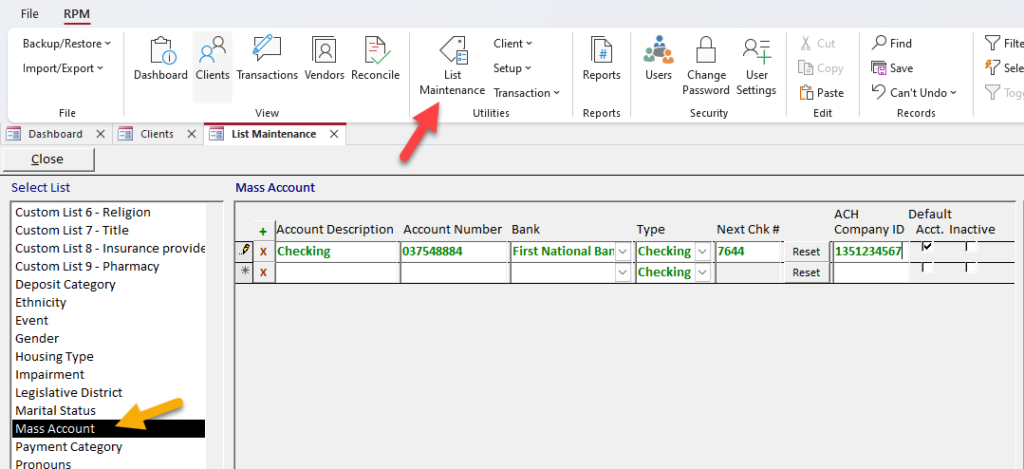
Mass account(s)
If you keep your clients’ funds in a mass (AKA collective) account, follow these steps to enter it into RPM:
- Open the List Maintenance screen from the Utilities section of the ribbon menu.
- Select the “Mass Account” list.
- Enter the description of the account in the “Account Description” field. If you want, you can leave it as “Checking.”
- If you will be printing the encoding line on your checks or exporting NACHA files, enter the account number.
- Select the bank for this account.
- Select the type of account (checking or savings).
- Enter the next check number that will print out of this account in the “Next Chk #” field.
- If you will be exporting NACHA files, enter the ACH Company ID number.
- If you have more than one mass account, ensure that the “Default Acct.” box is checked for your primary mass account.
When you are finished, the record will save automatically. You will be able to assign this mass account to clients on the Basic tab of the Clients screen.
To add another mass account, follow the same steps on a blank line beneath the previously entered account.
Individual account(s)
If any of your clients use individual accounts, follow these steps to enter them into RPM:
- First, enter a client record. For details on this, see our Adding clients instructions.
- Open the client record on the Clients screen and find the “Individual Account(s)” section.
- Enter the name of the individual account in the “Account Name” field.
- If this will be the client’s primary account for payments and deposits, check the “Default” box.
- If you will be printing checks, enter the account number.
- Select the bank for this account.
- Select the type of account (checking or savings).
- Enter the next check number for this account in the “Next Chk #” field.
To add another individual account for the same client, follow the same steps on a blank line beneath the previously entered account.
When transactions are entered for this client, the “Balance” field will be automatically calculated by the system. For instructions on how to enter initial balances, see our Moving client balances to RPM article.
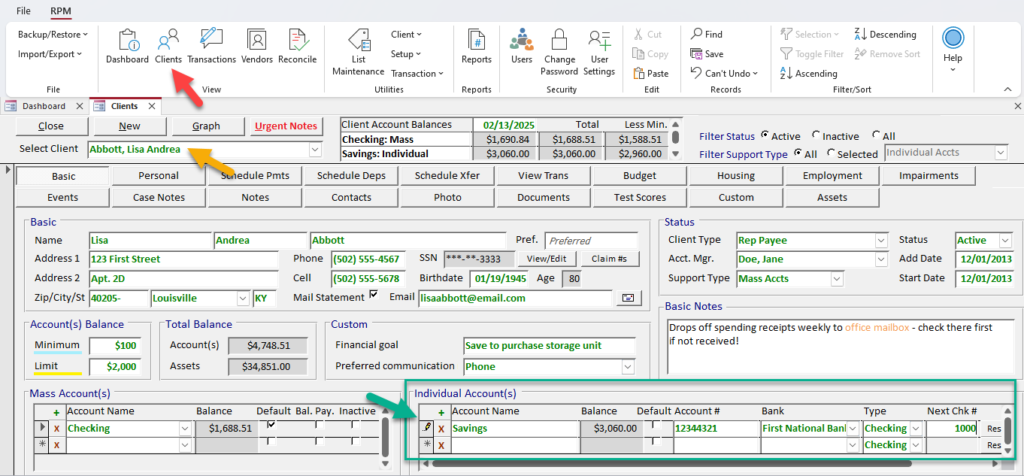
Note: Each client can be assigned to multiple mass and/or individual accounts. Check the “Default” box for the account they use most frequently.