Setting user schedules
RPM users who have rights to update user security can set other users’ schedules. This will limit their RPM access to specified work hours. Setting user schedules is an added layer of security to protect your clients’ data.
To set user schedules, follow these steps:
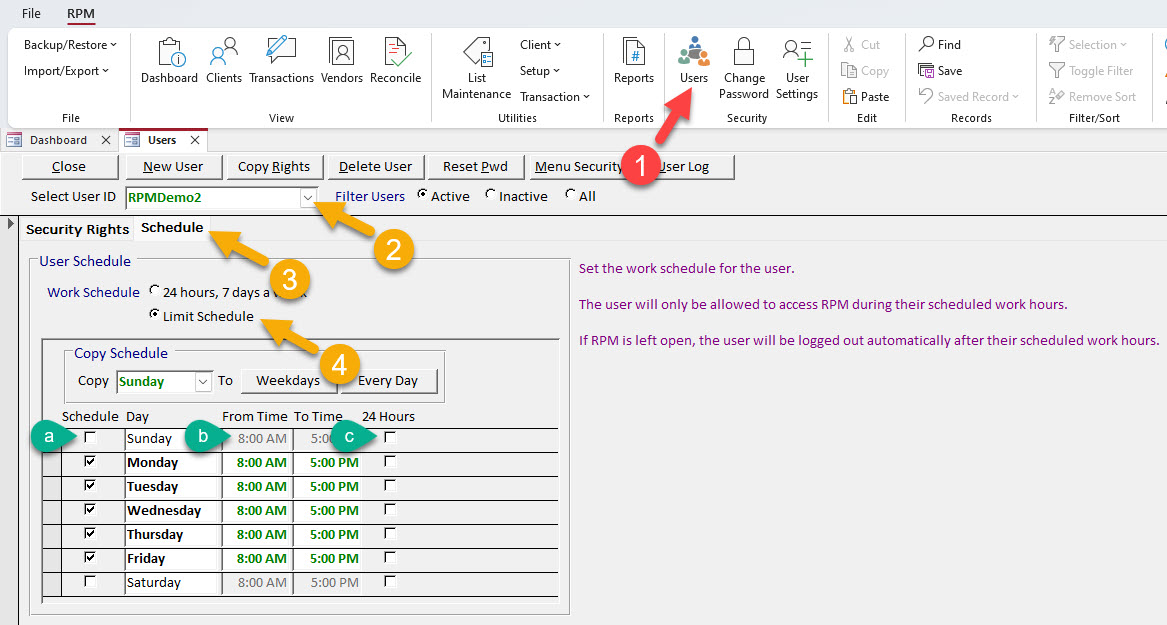
- Navigate to the Users screen from the Security section of the ribbon menu.
- In the “Select User ID” field, type or select the user ID of the user whose schedule you’d like to set.
- Click the Schedule tab.
- In the “Work Schedule” options, select “Limit Schedule.”
The default schedule set by the “Limit Schedule” option is Monday through Friday, 8:00 a.m. to 5:00 p.m. To alter that schedule: (a) select different days by checking and/or unchecking boxes in the Schedule column; (b) change work hours by entering different start and end times in the “From Time” and “To Time” columns; and, if you want, (c) permit all-day access to RPM on some days by checking the “24 Hours” box on those days.
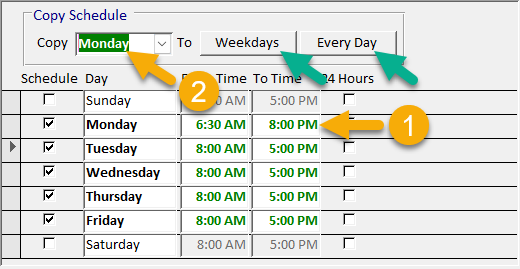
To save time, you can use the “Copy Schedule” section of the screen to copy the work hours on one day to other days. To do this, (1) enter the desired hours for one day (1), select that day in the “Copy” field (2), then click either Weekdays (to copy those hours to weekdays) or Every Day (to copy those hours to every day of the week).
Note: Users will not be able to log in to RPM outside of their scheduled work hours. RPM will also automatically log users out if they attempt to work past their scheduled end time. To prevent this from interrupting your users’ work, be sure to set end times for the latest possible time you want your users to be able to work in RPM on any given day.