How can we help?
Security rights for users
Existing users’ security rights can be changed at any time. This can be done by any user who has rights to update the Users screen. To find out who has those rights, follow the Security rights to the Users screen instructions.
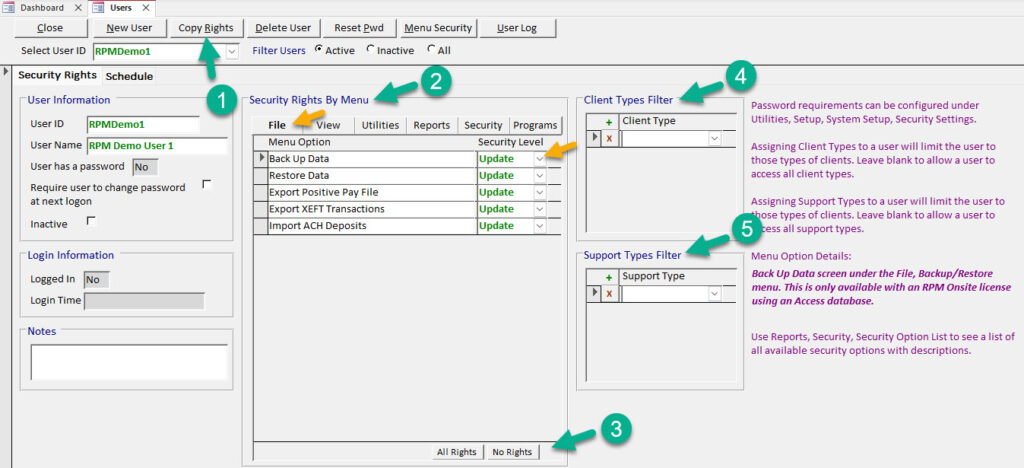
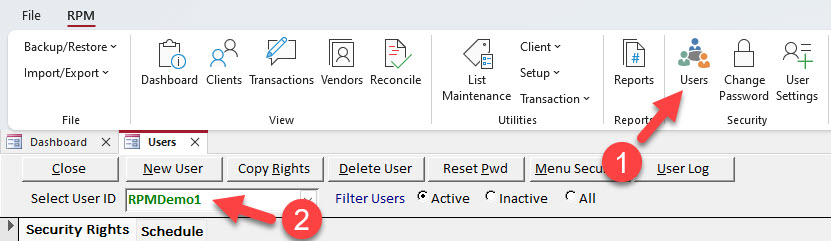
Once you are logged in as a user with rights to update the Users screen, navigate to this screen (1). In the “Select User ID” field, enter the user ID of the user whose security rights will be changed (2).
There are several ways to update user security rights on this screen.
- To quickly give a user the same rights as another RPM user, click Copy Rights. On the resultant screen, select the user whose rights you’d like to copy in the “From User” field, then click Copy.
- To manually customize a user’s rights, use the “Security Rights by Menu” section of the screen. Each tab (File, View, Utilities…) shows different RPM functions and screens. Choose which rights to change, and change them by selecting from the available options under “Security Level,” which can include “None,” “Update,” or “View.”
- To give the user all possible rights for a menu, select that menu’s tab, then use the All Rights button. To remove all the user’s rights for a menu, select that menu’s tab, then use the No Rights button.
- To limit a user’s rights to certain types of clients, use the “Client Types Filter” section of the screen. In the “Client Type” field, enter the client type(s) the user will be allowed to work with.
- To limit a user’s rights to clients with designated support type(s), use the “Support Types Filter” section of the screen. In the “Support Type” field, enter the support type(s) the user will be allowed to work with.
Tip: Your company’s client types and support types can be configured on the List Maintenance screen.