Electronic signatures
Electronic signature files can be printed directly on checks through RPM. Signature files can be shared across your company and/or used by individual users.
Use the Check Layout screen under the Utilities, Setup menu to manage your signature files. Click Help when the screen is open to see the full help topic.

Company-wide signatures
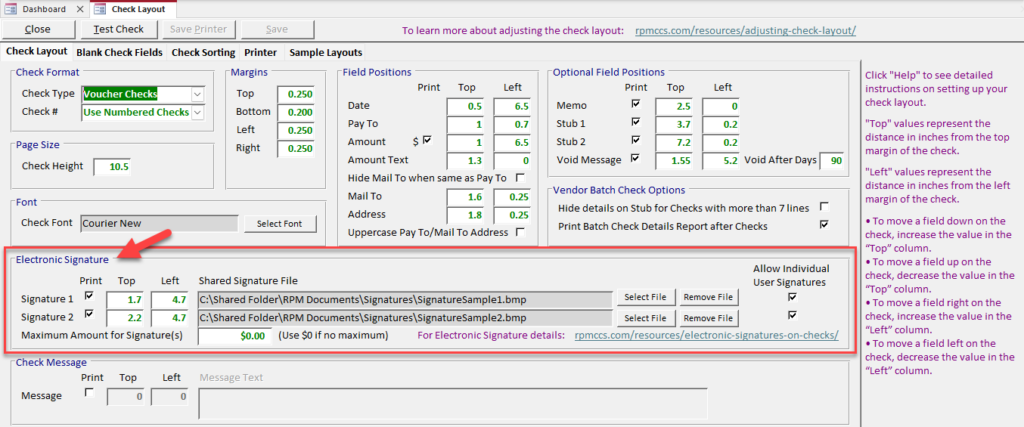
For shared signatures that may be used when any RPM user prints checks, select the shared signature files in the “Electronic Signature” section of the Check Layout screen.
Set one or both signature lines to print by marking the “Print” checkbox(es). Then, click the Select File button to select the file location from your computer. To alter the position of the signature files on the check, adjust the values in the “Top” and “Left” fields. Guidance on how to adjust these values can be found in the purple help text on the screen.

Note: Shared signature files should be saved in a location that all check printing users can access. For RPM Cloud, use the “Shared Folder” in the C: drive.
Personal user signatures
Individual users can also set their own unique signatures for check printing. These signatures, if added, will overwrite shared signature files to print on checks.
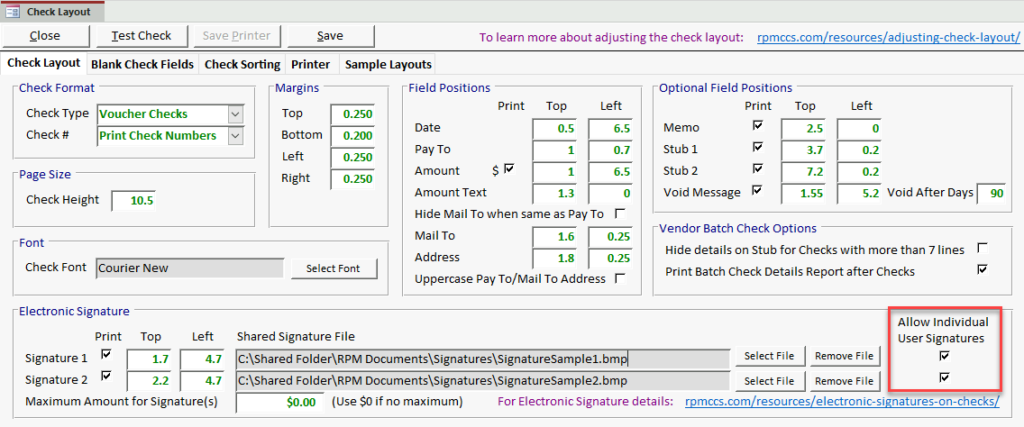
To allow individual signature files to be used, enable “Allow Individual User Signatures” for one or both of the signature lines on the Check Layout screen.

If one or both signature lines are set to allow individual user signatures, each RPM user will be able to select their own unique signature file(s) on the User Settings screen. If no personal signature file is selected, the system will default to printing the existing shared signature file in that space.

Creating signature files
To create an electronic signature for RPM, scan a page with the signature and save the scanned signature as a bitmap (bmp) file. Signature files should not be larger than 3” x ½”. The entire image paper size needs to be 3 x ½”—not just the signature portion. For example, if you scan your signature on a full sheet of paper, you must crop the signature portion to be no more than 3” x ½” in total size.
Use the form below to sign and scan your signature.
A blank signature file of the correct size is available below. Copy and paste your scanned signature into this file and save it as your signature file. It must fit in the available size of 3” x ½”.
A sample signature file of the correct size is available below. Use this to test a signature on your check layout, or compare it to the format of your signature file.
Once the file is created, save it in an appropriate location. Once you have your file(s), assign them in RPM on the Check Layout screen (for shared signatures) and/or the User Settings screen (for individual signatures).
If you need additional assistance creating a signature file and using it in RPM, purchase a remote support session.
