Vendors
Clients make payments to many different vendors. These vendors can be tracked in RPM.
You do NOT need to enter your clients as vendors; payments can be made directly to clients.
Adding new vendors
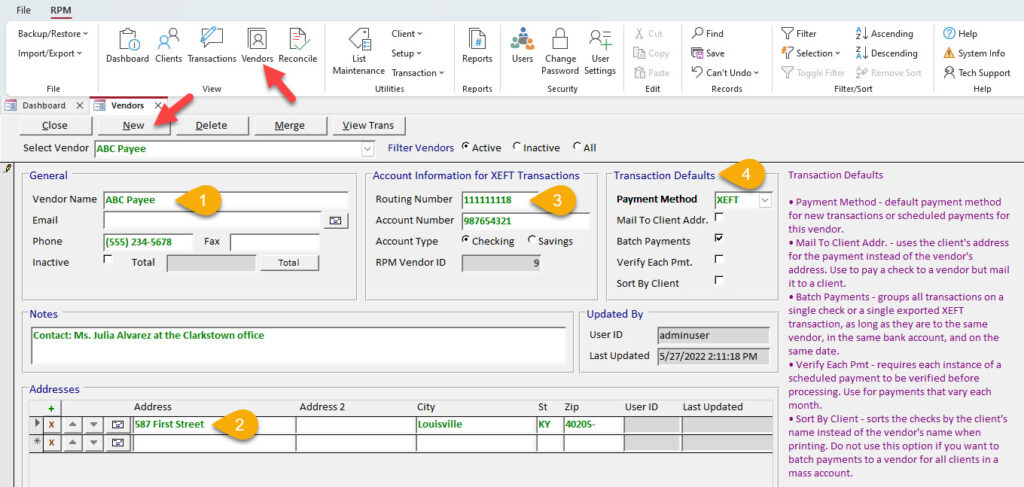
Click New on the Vendors screen to add a new vendor.
- Enter the name of the vendor.
- Enter the address(es) to which payments will be mailed. Multiple addresses can be entered for each vendor.
- Enter the routing number and account number to make payments electronically to the vendor.
- Enter the transaction defaults for the vendor. A description for each default option is shown on the screen.

Repeat these steps to add additional vendors.
Vendor defaults
For each vendor, certain default options can be configured to save you time later when creating or scheduling payments. These defaults are as follows:
- Payment method – This payment method will populate automatically when you enter or schedule a transaction for this vendor.
- Mail to client address – Check this option if payments to this vendor are usually mailed directly to the client.
- Batch payments – Transactions to this vendor will group together on a single check or single XEFT, as long as they are to the same vendor, in the same bank account, and on the same date.
- Verify each payment – Use this to require verification for scheduled payments that vary in amount, like utility payments.
- Sort by client – Sorts checks by the client’s name instead of the vendor’s name when they’re printed. Don’t use this if you want to batch payments to this vendor.
Transaction defaults for a vendor can be set at the time a vendor is added and/or changed later for existing vendors.
Regardless of the defaults, the details on each individual transaction and scheduled transaction can be changed manually.
Updating existing vendors’ defaults
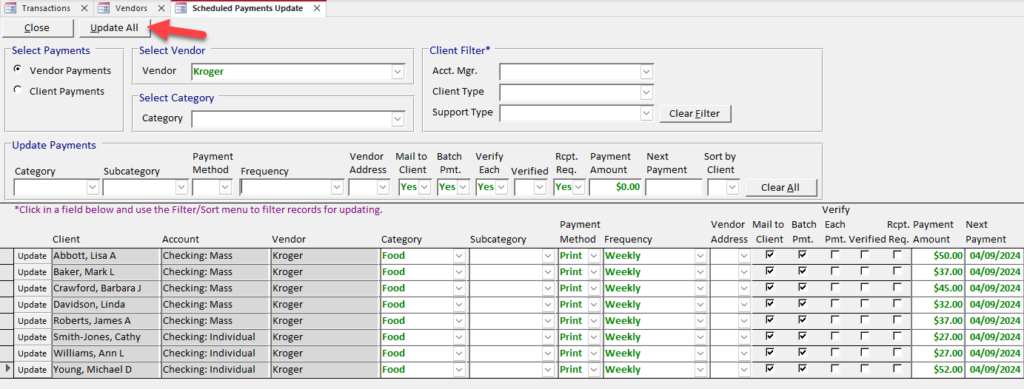
If the defaults are changed for an existing vendor that already has scheduled transactions, you will have the option to automatically update those scheduled payments. A message like this one will appear:

Clicking Yes will open the Scheduled Payments Update screen, which will already show the scheduled payments for that vendor and the changes you made to that vendor’s defaults. Simply click Update All to update the scheduled payments to the vendor’s new defaults.

Batching payments
There are two things that must both be changed in order to batch payments by default:
- The vendor defaults must be set to batch.
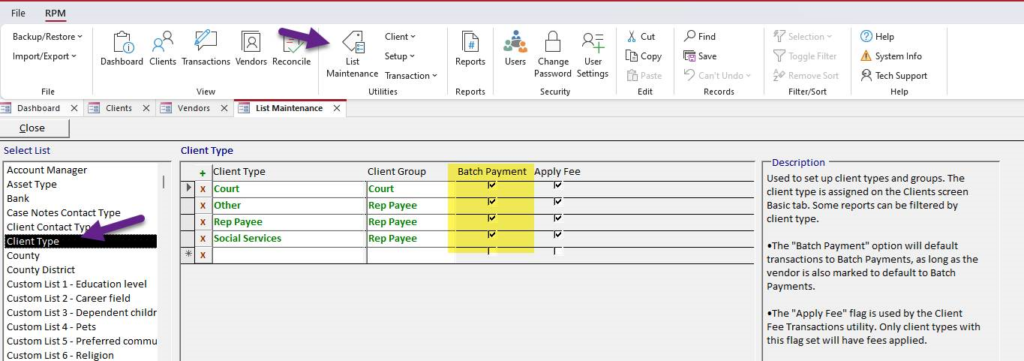
- The client types must also be set to allow batching.
To update the client type batching settings, open the List Maintenance screen and navigate to the “Client Type” list. For each client type that will allow payments to be batched, ensure the “Batch Payment” box is checked.

Vendor list report
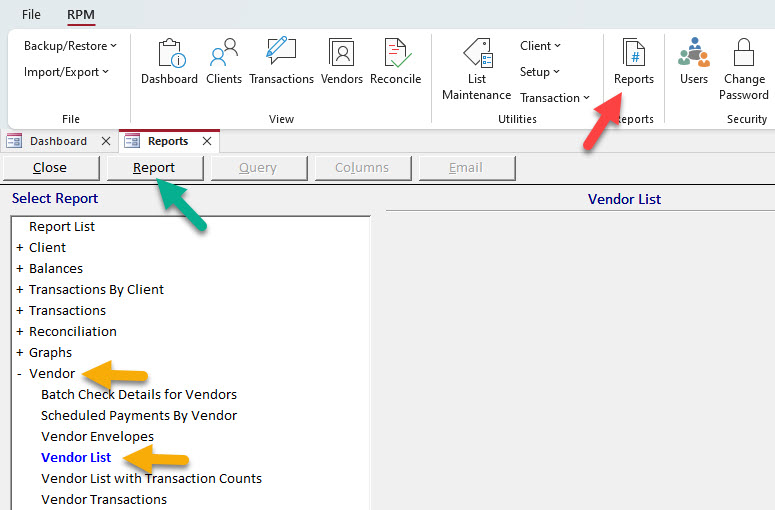
To see a list of all your vendors, use the Reports screen.
Navigate to the the Reports screen, select the “Vendor” report section, then select the Vendor List report. Click Report.

