Reports
A wide array of reports can be run using RPM. There are reports that can be sent directly to your clients, reports for your company’s internal use, and customized reports you can create to fit your unique needs.
See all reports
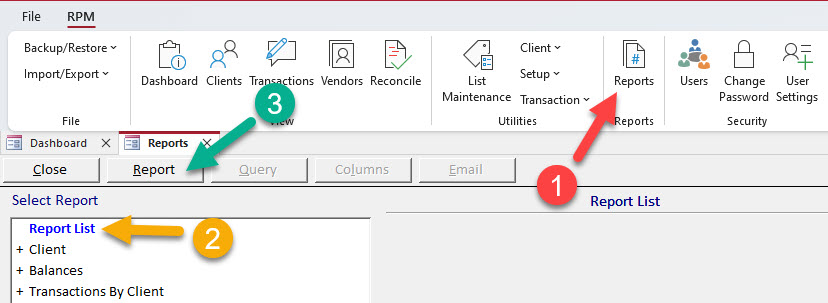
To view all available reports, follow these steps:
- Select the Reports icon in the ribbon menu to navigate to the Reports screen.
- Click Report List.
- Click Report.
Preset reports
To create reports using preset templates, begin by selecting the Reports icon in the ribbon menu. Click on a category to view all available reports related to that category. In the example below, the “Reconciliation” category has been selected.
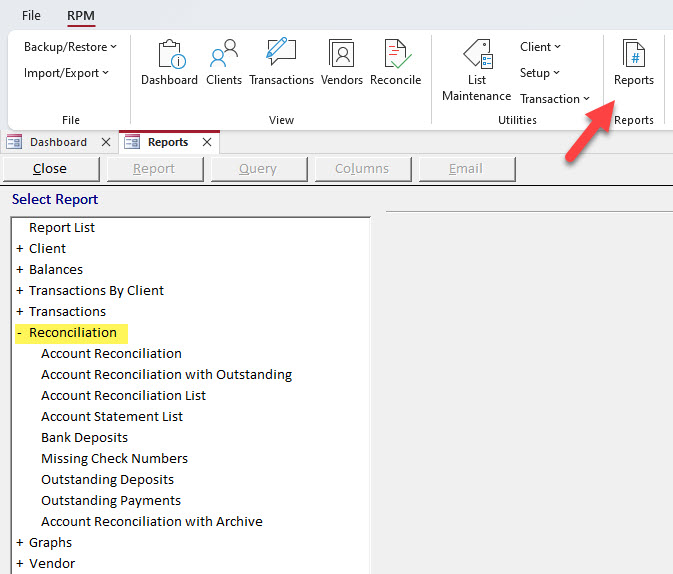
Once you have selected a category, follow these steps:
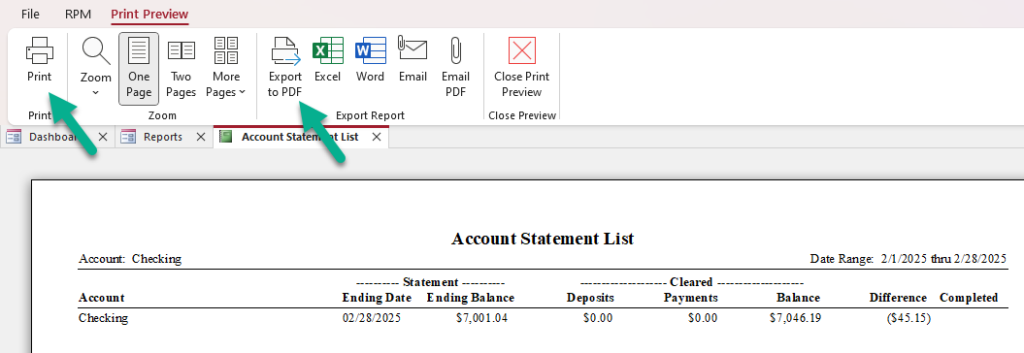
- Click on the name of any report. In the example below, the Account Statement List report has been selected.
- Add or alter the required fields. In this example, a date range is required.
- Optional: Add or alter any optional fields. These can be left blank. In this example, an account has been specified.
- When you have entered all desired information, click Report.

Reports will open in a Print Preview. From here, you can print or export the report.
Custom reports
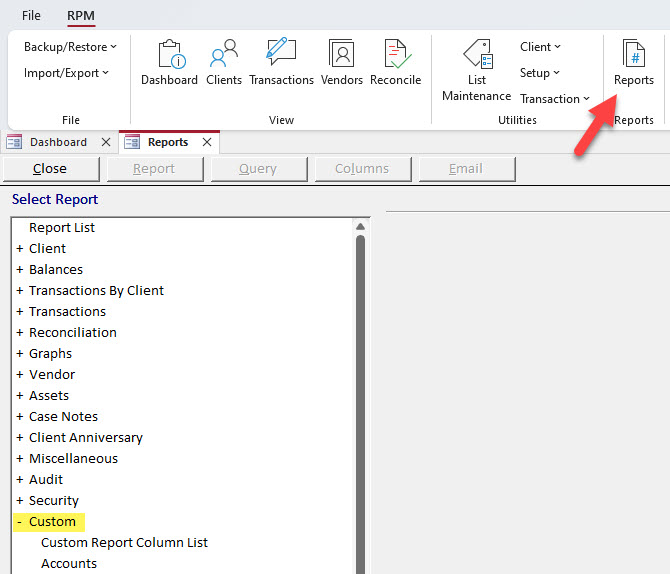
To create custom reports, begin by selecting the Reports icon in the ribbon menu. Click on the “Custom” category at the bottom of the categories list, as shown below.
Next, select any custom report template below the “Custom” category. In the example below, the “Accounts” template has been selected (1). Click the Columns button to edit the information your report will include (2).

On the resultant screen, select any combination of columns to display on your custom report (1). When you have selected your desired columns, click Save New to save your custom report template (2). Answer Yes to the dialog box.

When you have saved your custom report, Close the Custom Report Column Selection screen to return to the Reports screen. Add or alter any required fields (in the example below, a thru date is required) (1). Optionally, add or alter information in the optional fields. Finally, click Query (2).

Your custom report will display in a Print Preview in Query format. From here, you can print or export the report.
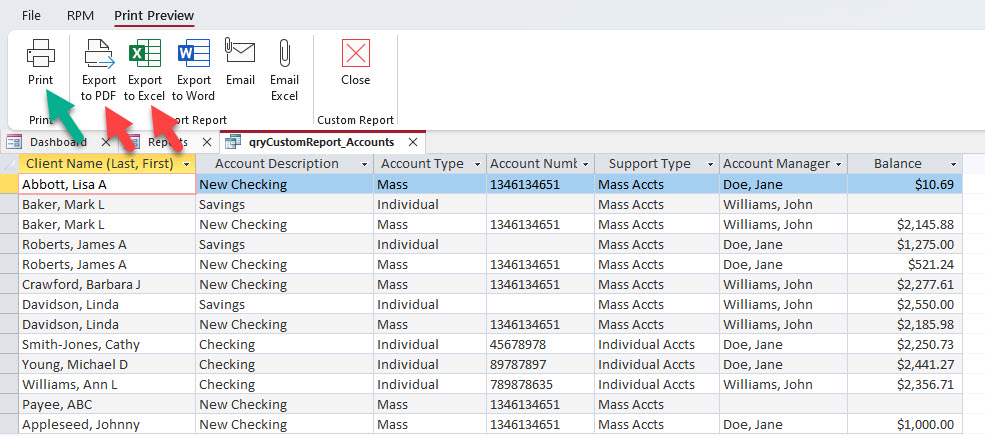
Tip: If you want to copy and paste the query data to a new spreadsheet, use “Ctrl+A” to select all the data, “Ctrl+C” to copy it, and “Ctrl+V” to paste it to your desired location.
