Adjusting the check layout
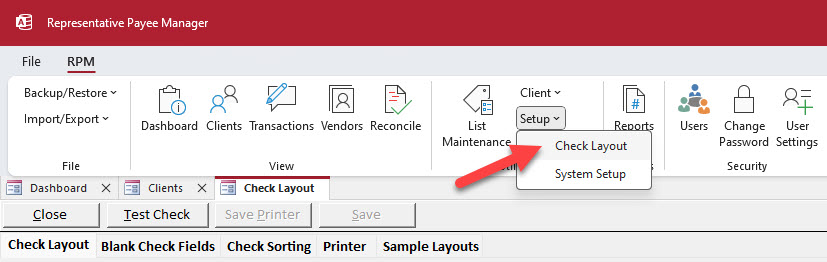
If you’ve selected the correct sample check layout and aren’t satisfied with the way the information prints on your checks, you can manually adjust the details. All adjustments can be made by navigating to Utilities > Setup > Check Layout.
Font
To change the font or font style that prints on your checks, look in the “Font” section of the “Check Layout” tab and click the Select Font button. A dialog box will open. Select your desired font and font style, then click OK.
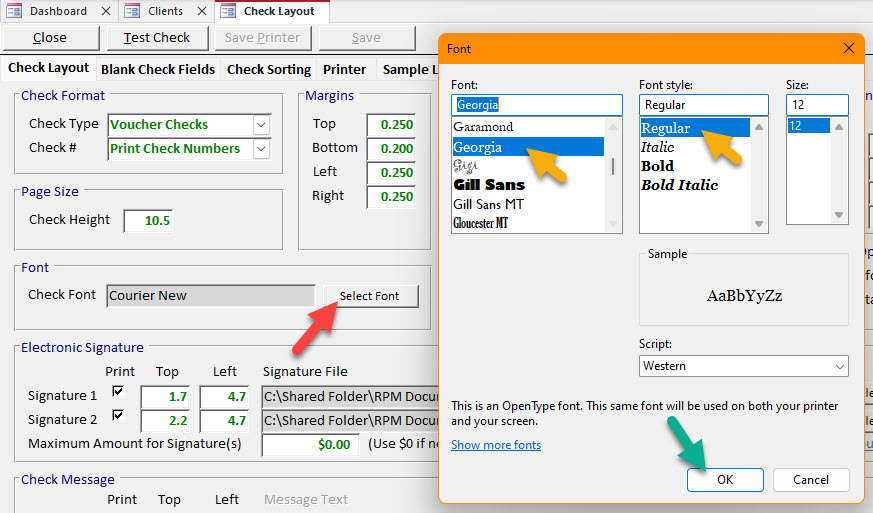
Note: The font size cannot be changed. If your fields are overlapping, adjust the field positions.
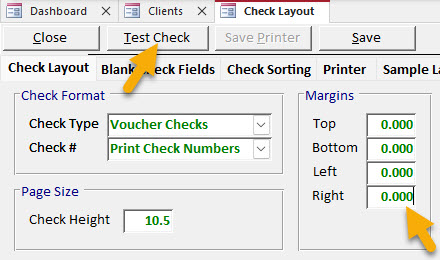
Margins
Adjust the margins of your check by changing the values in the “Margins” section of the “Check Layout” tab. To use more of the available room on the page, decrease the margins. To add blank space around the fields that print on your checks, increase the margins.
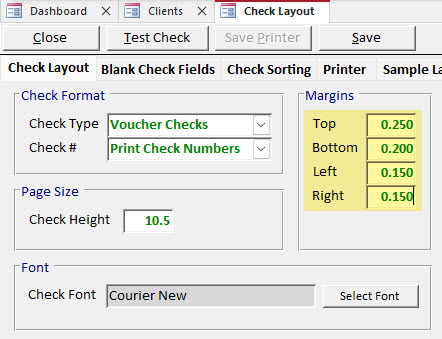
Setting margins as small as possible
Each printer has a minimum margin size it will allow. To make your margins as small as possible for your printer, begin by changing all margins to zero. Then, print a Test Check. The margins will be automatically changed to the smallest size your printer can process.
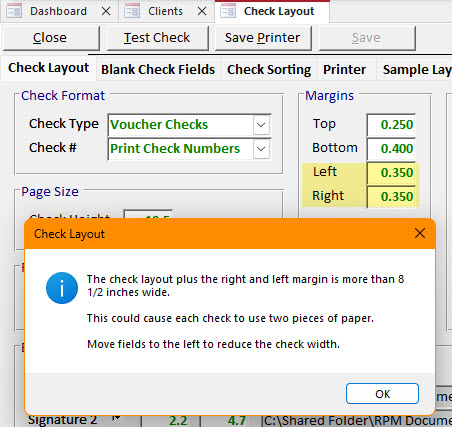
Warning message after increasing margins
If you try to set your margins too wide, RPM will warn you that your check will no longer fit on a single page. If that happens, either decrease your margin size or move your check fields to make room for the larger margins.
Field positions
To move text fields around on your checks, adjust the values in the “Field Positions” and “Optional Field Positions” sections of the “Check Layout” tab.
For any field, adjust the values according to these guidelines:
- To move a field down on the check, increase the value in the “Top” column (highlighted in yellow).
- To move a field up on the check, decrease the value in the “Top” column (highlighted in yellow).
- To move a field right on the check, increase the value in the “Left” column (highlighted in purple).
- To move a field left on the check, decrease the value in the “Left” column (highlighted in purple).
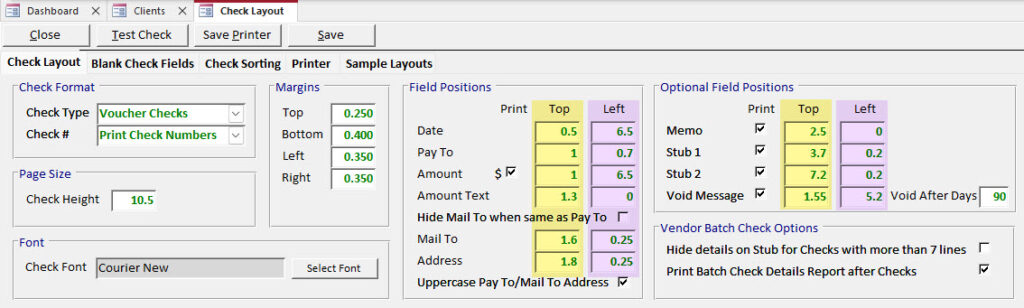
Most lines of text on the checks will be 0.2 inches tall. This means that your field values should be at least 0.2 inches apart to prevent overlapping.
Note: Field position values do not include the margins. This means that if you want the date field to be 0.4 inches from the top of the page, and the top margin is 0.1 inches, set the field position value to 0.3 inches.
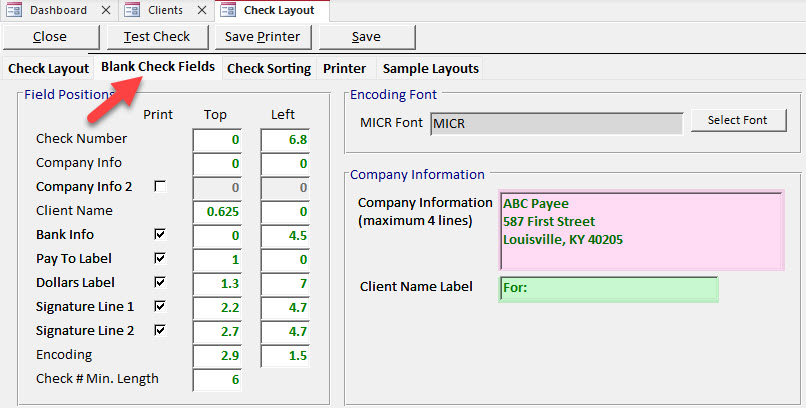
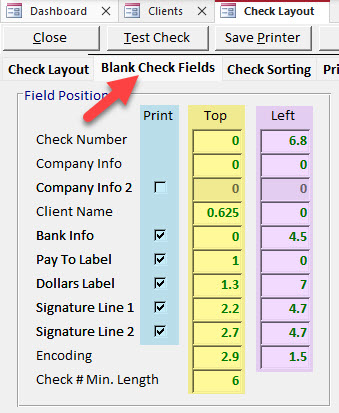
Blank check fields
Blank check fields can only be changed if your “Check #” is set to Print Check Numbers on the “Check Layout” tab. These fields should already be printed on pre-numbered checks.
Blank check field positions
Customize which fields print on your checks by checking and/or unchecking boxes in the “Print” column (highlighted in blue).
For any field, adjust the values according to these guidelines:
- To move a field down on the check, increase the value in the “Top” column (highlighted in yellow).
- To move a field up on the check, decrease the value in the “Top” column (highlighted in yellow).
- To move a field right on the check, increase the value in the “Left” column (highlighted in purple).
- To move a field left on the check, decrease the value in the “Left” column (highlighted in purple).
Encoding font (MICR)
All checks need encoding information to be processed by the bank. To print this encoding information yourself, you need a MICR font and MICR toner. MICR fonts are included when you install RPM. You’ll need to purchase MICR toner for your printer.
There are several MICR fonts included in with RPM. Most banks accept the basic, default MICR font. If you must change your MICR font, use the Select Font button.
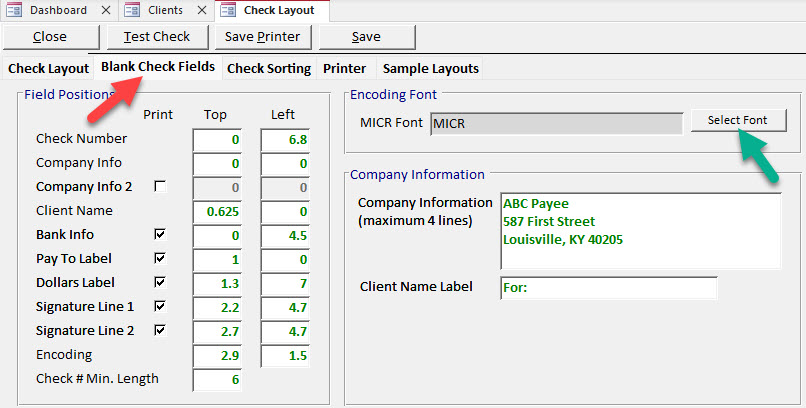
Company information and client name label
If your company information is not already printed on your check paper, type it in the “Company Information” field (highlighted in pink). You can include up to four lines of company information to print on your checks.
When payments are made from individual bank accounts, the client name label and client name will print on your checks. To change what the label says (for example, to write “For the benefit of:”), type it in the “Client Name Label” field (highlighted in green).