Moving mass accounts
If you’re using one or more mass accounts in RPM, you might need to switch clients and scheduled transactions from an outdated account to a new one. There’s an easy way to do this; just follow along below.
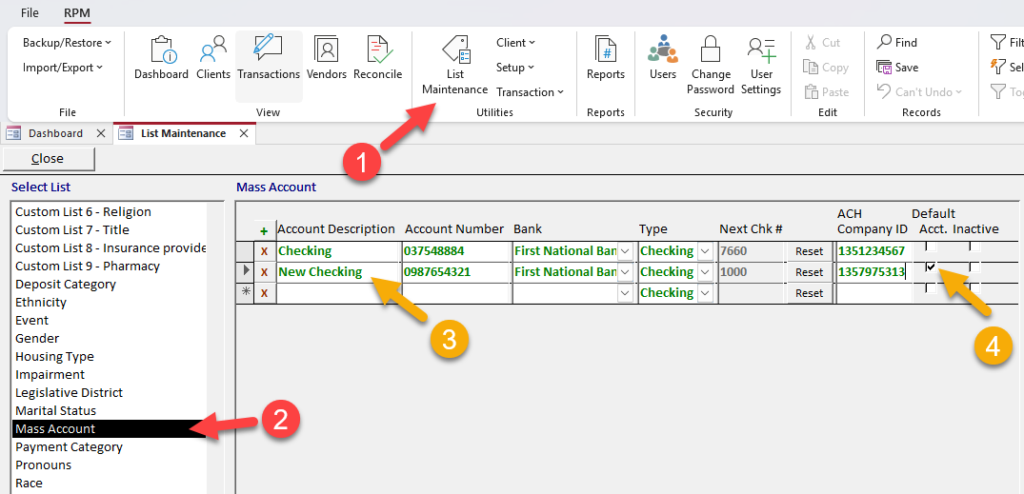
1. In RPM, open the List Maintenance screen from the ribbon menu.
2. Select the “Mass Account” list.
3. On a new line, enter the name and information for your new mass account.
4. If you want this account to be the default for all new clients, check “Default Acct” for the new account. The default checkmark on the old account should be removed automatically.
5. At the bottom of the screen, click Move Acct.

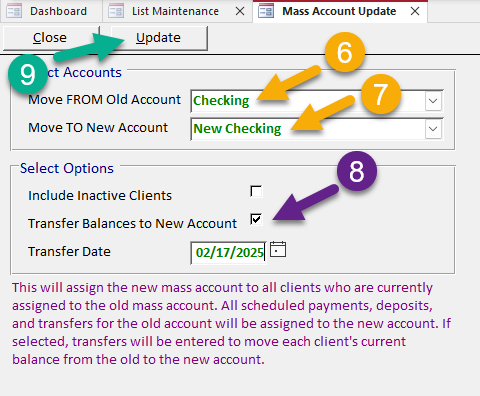
6. A screen called Mass Account Update will open. Select the old account in the “Move FROM” field.
7. Select the new account in the “Move TO” field.
8. If you will be transferring your clients’ balances from the old account to the new account, check the “Transfer Balances to New Account” option.
9. Click Update. After reading the information in the popups thoroughly, click Yes and OK to complete moving your clients to the new account in RPM.
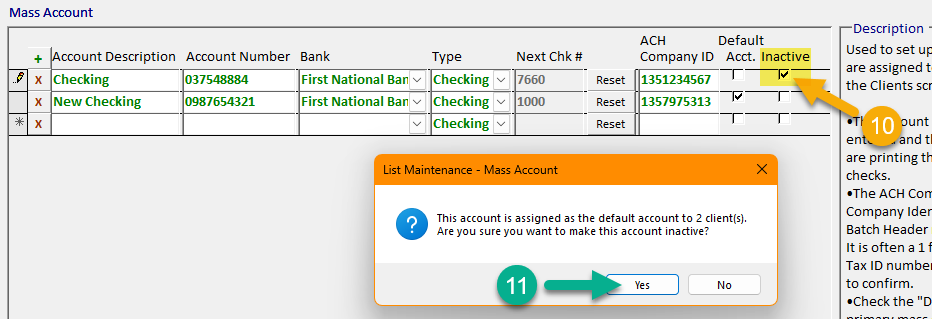
10. Back on the List Maintenance screen, check “Inactive” for the old account.
11. If you did not include inactive clients in the move to the new account, you may see a warning saying that some clients are still using the old account as their default. That’s fine; click Yes. This will prevent future transactions from being entered for the old account.
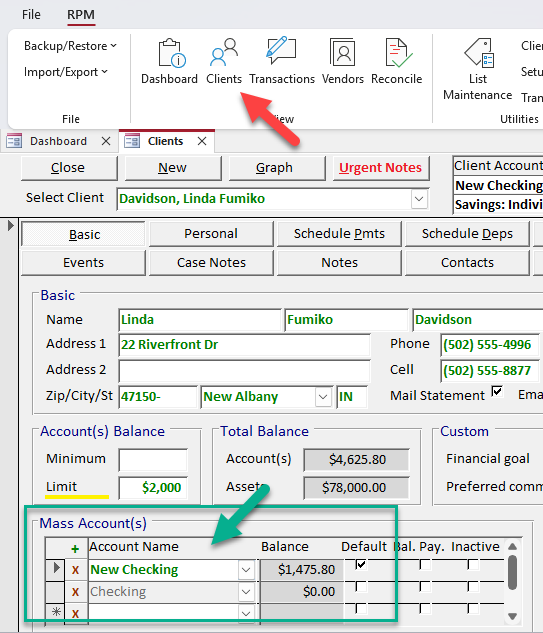
Once you have completed the above steps, you can check to make sure the new account was successfully assigned to your active clients. On the Clients screen, select any active client and make sure the information in the “Mass Account(s)” section looks like it does in the image below, with the old account in gray, the new account listed as default, and the client’s balance in the new account.