Finding, filtering, and sorting
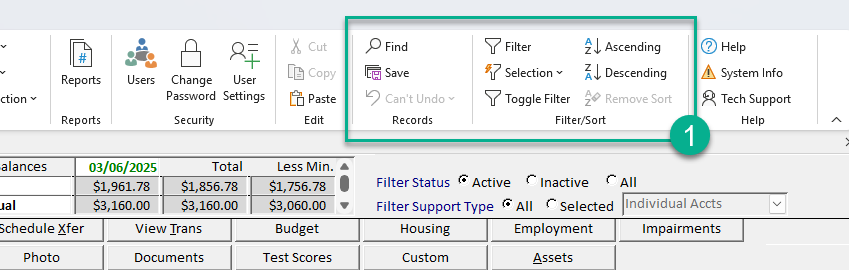
There are several tools built into RPM you can use to locate the specific information. These tools can be found in two places: 1) the ribbon menu at the top of RPM, and 2) the shortcut menu that opens when you right-click in a data field.
Below, I’ll explain how to use the Find, Filter, and Sort tools to locate and view information in the system more easily.
Find
To locate a specific number, name, or word/phrase on the screen you’re looking at, you can use the Find tool. This tool searches through all instances of a certain field on the screen to find the information you’ve specified.
Follow these steps to use Find:
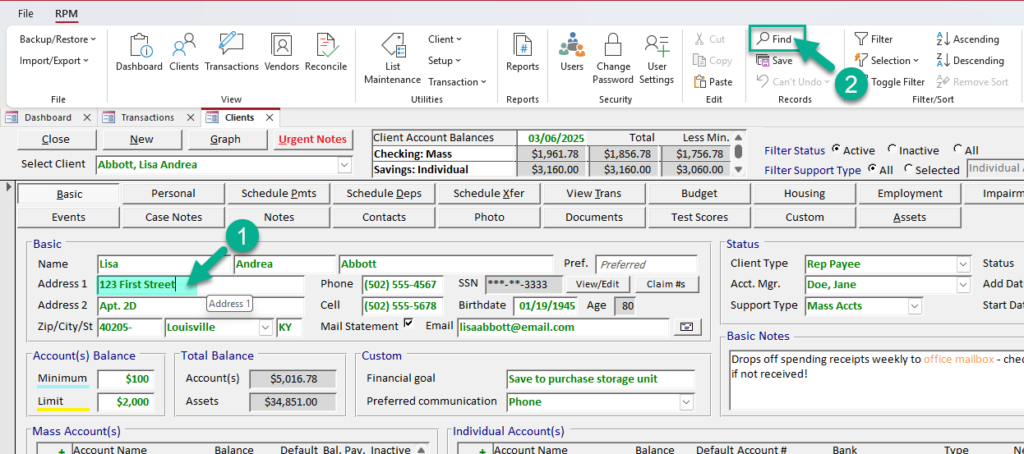
- Click or tab into the field that contains the information you’re looking for. In the example below, we’ll be searching for a client’s street address.
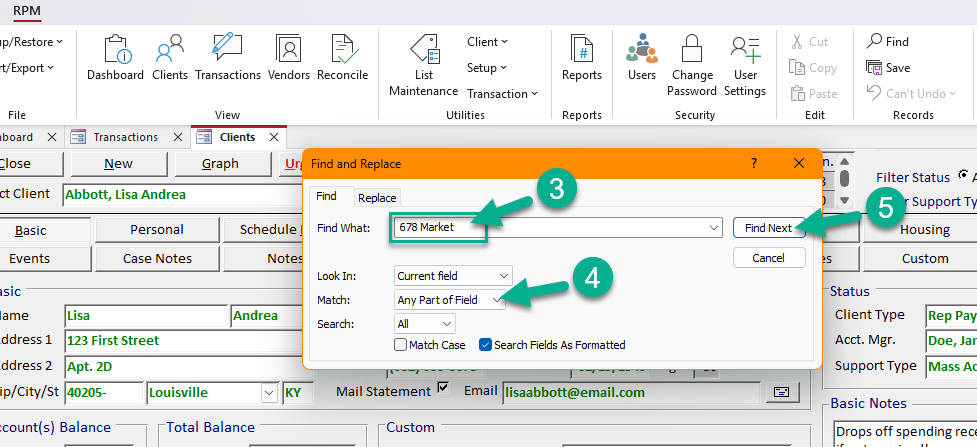
- In the Records section of the ribbon menu, click Find.*
- Type the information you’re looking for in the “Find What” field.
- Select your desired options for the “Look In” and “Match” settings. In this example, we only want to search in the “Address 1” field, so the “Current field” option is fine. However, we’re only searching for part of the street address, so we want to use “Any part of field” instead of “Whole field.”
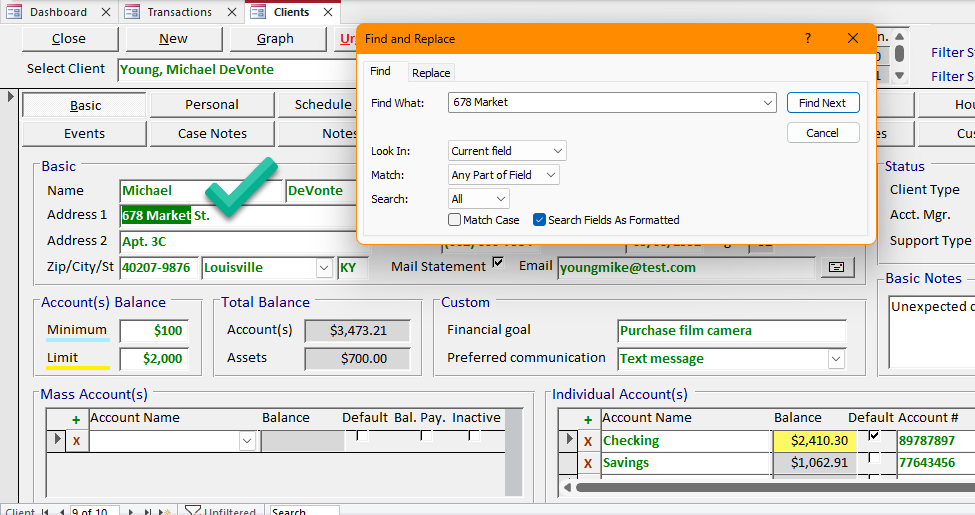
- Click Find Next to find the first match. In this example, we’ve located the client whose address begins with “678 Market.” Any additional matches can be found by continuing to click the Find Next button.
*Note: This example shows the Find tool in the ribbon menu. You can also use Find from the shortcut menu that opens when you right-click in a field.
By default, the Find tool will not search between different fields. For example, if your cursor is in the “Last Name” field and you search for “Taylor,” you might find Linda Taylor, NOT Taylor Rodriguez. To search information across fields on the screen, change the “Look In” setting to “Current document.”
If your “Look In” setting is “Current field,” be sure to click or tab into the field where the information will be before activating the Find tool.
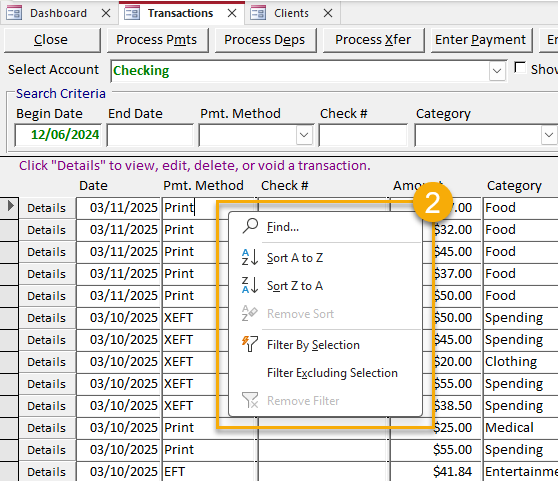
The gif below shows another example of using the Find tool. In this example, Find is selected from the shortcut menu after right-clicking in the “Check Memo” field on the Transactions screen.
Filter
To sift through items on the screen that fit specific criteria, you can use the Filter tool. This tool has a variety of uses depending on the information you’re working with.
Be sure to click or tab into the field you’re filtering before activating any of the Filter or Selection Filter options.
The simplest filtering options are available in the shortcut menu after right-clicking on a value. Here, you can Filter By Selection to see only the items with the value you’ve selected; you can also Filter Excluding Selection to remove items with the selected value from the screen.
The gif below shows an example of using Filter By Selection and Filter Excluding Selection from the shortcut menu on the “Pay To” field in the Choose Checks to Print screen.
Tip: Filtering can be used to narrow your selections before you mark, pay, deposit, or update all transactions on the screen. In the example above, filtering is used with the Mark All button to save time when selecting specific checks to print.
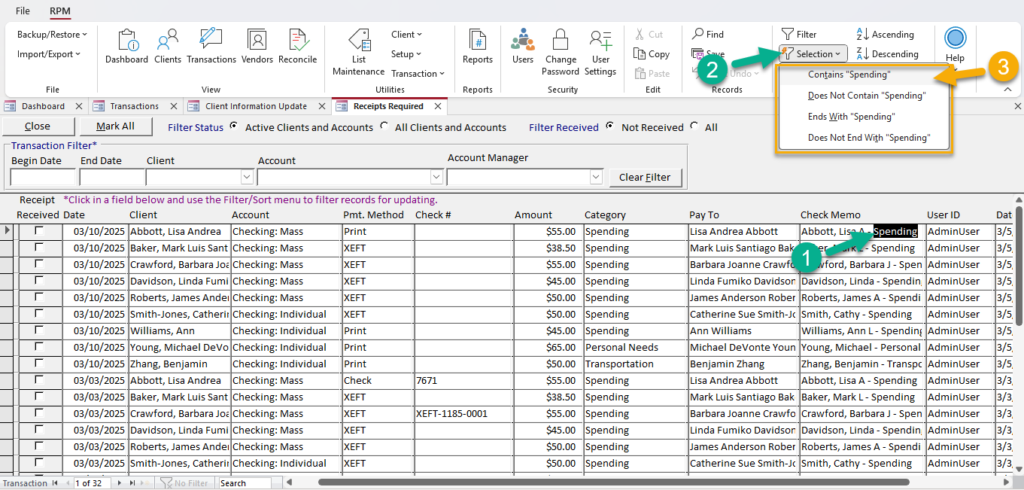
Either click in a field to select the entire field, or highlight specific information within a field. In the example below, the word “Spending” in the Check Memo field is highlighted, and the Selection Filter in the ribbon menu will be used to locate all transactions that contain “Spending” in the memo.
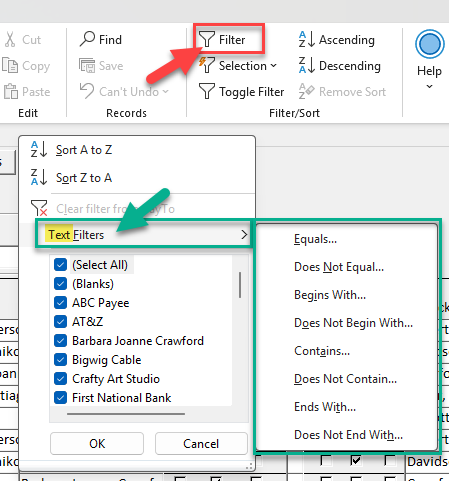
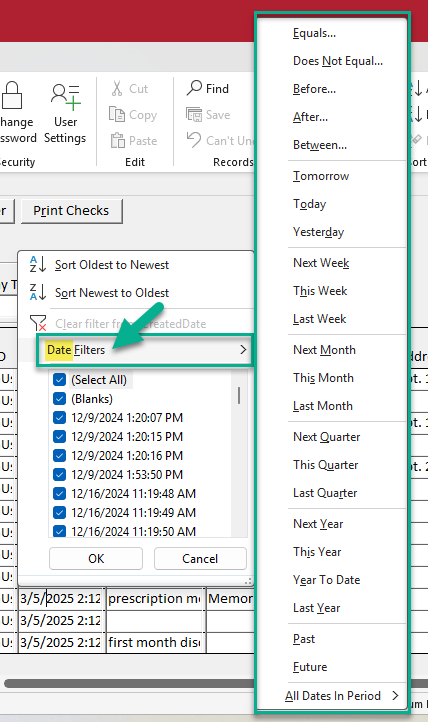
Different options are available for filtering text, numbers, and dates. Select any information and click Filter in the ribbon menu; then, expand the “Text Filters,” “Number Filters,” or “Date Filters” option shown in the popup menu. The type of filter available will depend on the type of information you have selected. Use any of the options available to narrow down the items shown on the screen.

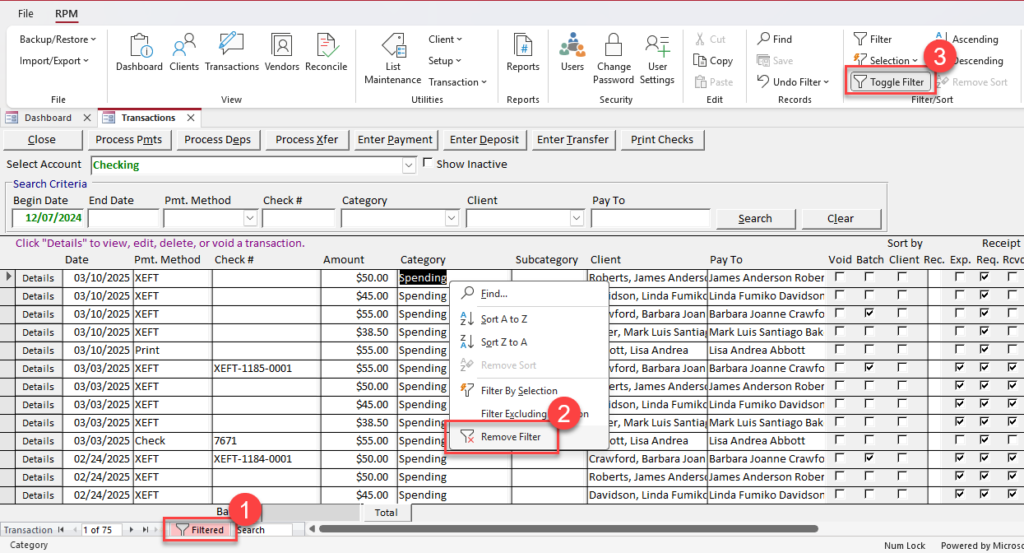
To remove the filter from your screen, there are three options: 1) Click the red Filtered button in the navigation bar at the bottom of the screen; 2) right-click and select Remove Filter from the shortcut menu; or 3) click Toggle Filter in the ribbon menu. All of these options will remove the filtering from your screen.
Sort
To arrange items on your screen in a certain order, you can use the Sort tool. This tool arranges values alphabetically (for words) or in order of amount (for numbers), from lowest to highest or from highest to lowest.
Follow these steps to use the Sort options:
- Click or tab into the field that contains the information you want to sort. This could be a column of information (like the “Check #” column on the Transactions screen) or a single field that is shared across multiple records (like the “First Name” field on the Clients screen). In the example below, we’ll be sorting the transactions in a reconciliation by amount.
- In the Filter/Sort section of the ribbon menu, click either Ascending or Descending to sort the information.* Ascending means smallest to largest, oldest to newest, or A to Z; descending means largest to smallest, newest to oldest, or Z to A. In this example, we’re sorting the transactions in ascending order (smallest to largest).
- To remove the sorting from your screen when you are finished, click Remove Sort.
*Note: This example shows the Sort tools in the ribbon menu. You can also use Sort from the shortcut menu that opens when you right-click in a field.


Be sure to click or tab into the field you’re sorting before activating the Sort tool.
The gif below demonstrates how to use the right-click shortcut menu to sort scheduled payments alphabetically by category. The scheduled payments are sorted in ascending order (A to Z), descending order (Z to A), and then the sorting is removed.