Ending unused scheduled transactions
Scheduled payments, deposits, and transfers can all fall out of use. If a scheduled transaction you no longer want to process is still appearing on your Dashboard, it can get in the way of the scheduled transactions you actually want to process.
Luckily, you can end these scheduled transactions and clean up your Dashboard. Follow along below to learn how.
On the Clients screen
Scheduled payments
On the Clients screen Schedule Pmts tab, make sure your display is set to “2 line” (next to the “Filter Payments” settings below the tabs). Locate the End Now button below the “End Date” field for the scheduled payment you want to end. Click End Now to immediately end the payment before the next payment date.

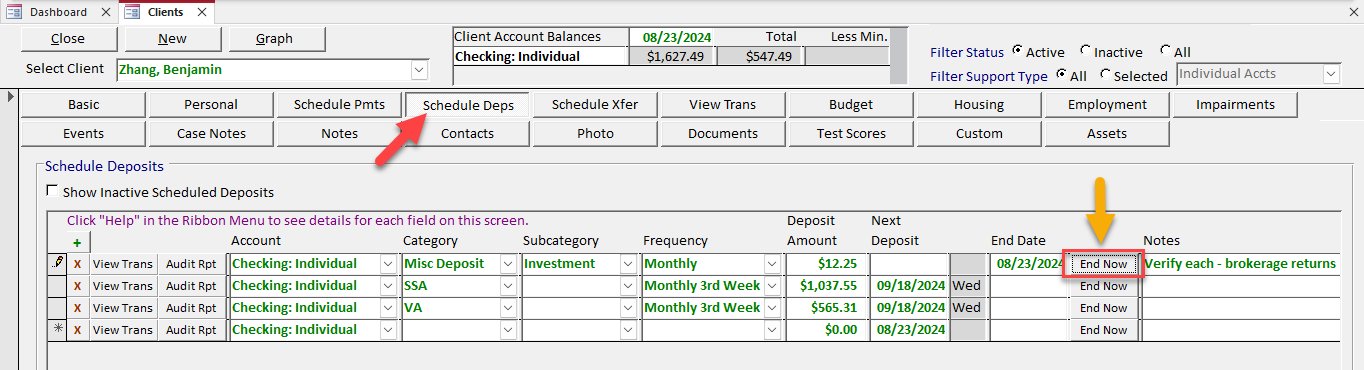
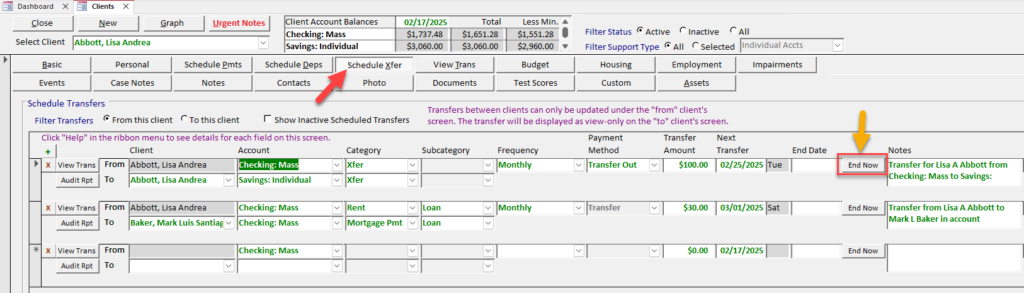
Scheduled deposits and transfers
For both scheduled deposits and transfers, the End Now button will display next to the “End Date” field. Click End Now to immediately end the deposit or transfer before the next transaction date.
On the Scheduling utilities
Scheduled payments
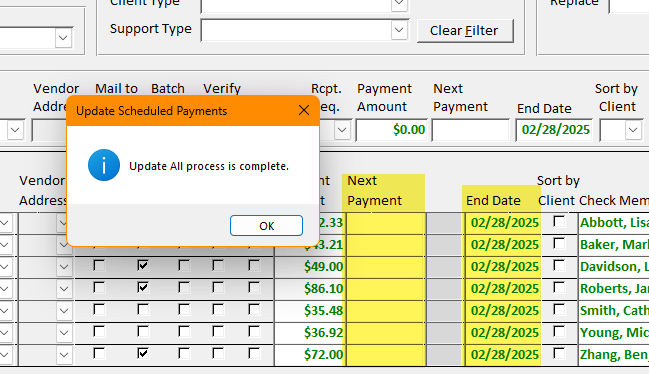
If you have a group of scheduled payments that you want to end—for example, if an entire payment category falls out of use—you can end them all more quickly using the Update Scheduled Payments utility. In the Utilities section of the ribbon menu, navigate to Transaction > Scheduling and click Update Scheduled Payments. Here, you can pull up any group of scheduled payments and edit them all in one place.
To end a group of payments, enter a date in the “End Date” field in the “Update Payments” section of the screen. To end the payments immediately, be sure this end date is before the “Next Payment” date for all payments.
Click Update All to apply the end date to all payments shown on the screen.
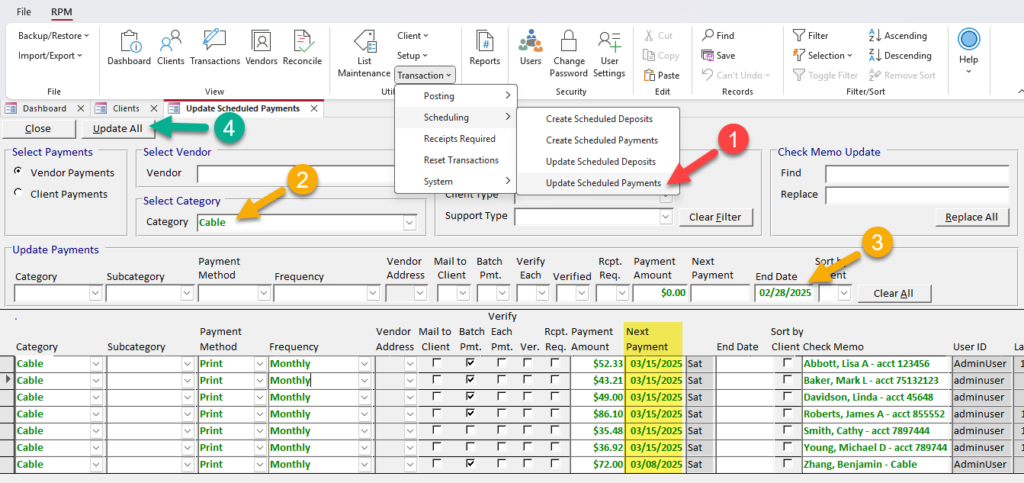
Entering an end date before the next payment date will automatically remove the next payment date and make the scheduled payments inactive.
Scheduled deposits
If you have a group of scheduled deposits that will no longer be used, you can end them all at once using the Update Scheduled Deposits utility. In the Utilities section of the ribbon menu, navigate to Transaction > Scheduling and click Update Scheduled Deposits. Here, you can pull up any group of scheduled deposits and edit them all in one place.
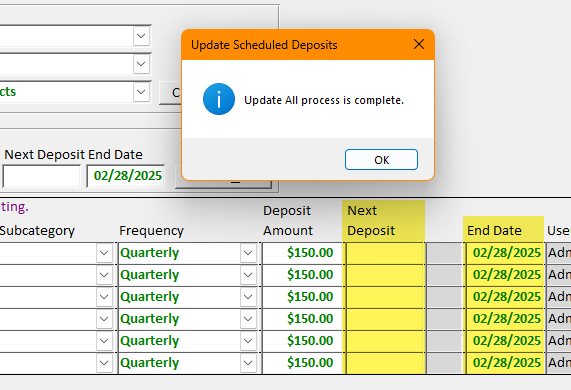
To end a group of deposits, enter a date in the “End Date” field in the “Update Deposits” section of the screen. To end the deposits immediately, be sure this end date is before the “Next Deposit” date for all deposits.
Click Update All to apply the end date to all deposits shown on the screen.

Entering an end date before the next deposit date will automatically remove the next deposit date and make the scheduled deposits inactive.